Showing posts with label DIY. Show all posts

Sunday, November 10, 2013

DIY Chicken Wire Bulletin Board

I have pictures of my family and friends all over my apartment. I love taking pictures, and I love having them up to look at every day. My brother currently lives in Spain, and lot of my friends live in other cities and states, so seeing their faces in pictures every day makes everyone seem a {little} less farther away.

I found this big white frame in the attic at my parents' house. I went to Lowe's and purchased some chicken wire. The smallest roll of chicken wire I found was about 4ft x 10 ft. Let's just say I have enough left over to make an actual chicken pen. 

I wish I had more pictures for the step by step, but hopefully these finished-product pictures are explanatory enough. 


I laid the chicken wire over the frame and cut it about one inch bigger than the frame. I then nailed half-inch nails every 3-4 inches along the inside of the frame. If one of the pieces of chicken wire was near the nails, I twisted it around the nail. The other pieces of chicken wire are not attached to any nails, they just stay in place.


Picture Organization


Picture Organization Desk Decor


That's it really!

Wednesday, October 30, 2013

DIY Fabric Flower Lamp Shade


As soon as I recovered my burlap ruffle lamp shade, I was itching to recover the other plain lamp shade in my bedroom. 


I  purchased this lamp on sale at Pier 1 Imports for $39.99. I loved the base, but the solid, cream-colored lamp shade was basically begging me to change it somehow. 

I purchased plain white fabric (similar to bedding sheets) and cut it into 1.5 foot by 0.5 inch strips. I folded the strips in half length-wise and ironed them to press the fold. Then, I curled the strips into a tightly wound coil. I slowly released the coil in my hand, and let the fabric spread out naturally to reach the size of flower I wanted to use. I then and applied hot glue to the back (folded) side. 


Easy! It really doesn't have to be perfect. The variations and imperfects actually make it perfect. This project probably took me around an hour. 


Monday, October 28, 2013

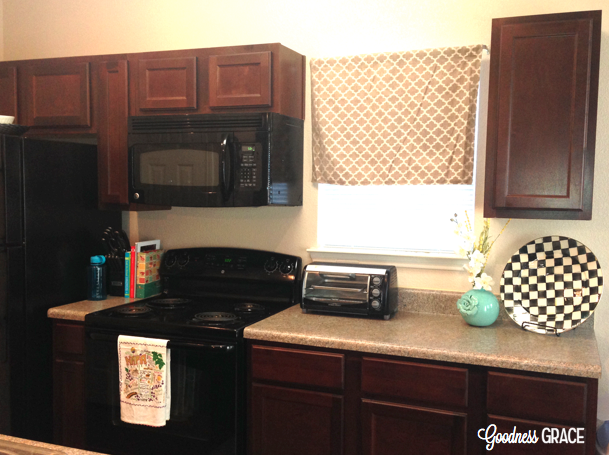
DIY No-Sew Curtain

This was a perfect project for my grad-school budget and time frame :) It took about 20 minutes, and I used materials I already had at my apartment. 

I used about a half-yard of leftover fabric to make this curtain for my kitchen window. The width of my window was 22" so I cut the fabric 25" wide. I also cut it around 20" long. 

To avoid pulling out my sewing machine, I used Iron-On Hem Tape from Hobby Lobby for all of the seams. Here's how I did it:

I laid the hem tape right along the edges of the fabric. 


I placed the sticky side of the tape against the fabric and ironed it to the fabric. 


Then, I peeled off the white layer of the tape.


I folded the fabric just over the tape, and ironed it again. 


I used that process for the bottom and both side edges. For the top, instead of folding the fabric just barely over the tape, I folded over 2 inches before ironing the seam. This creates the pocket for the curtain rod to slide through.


Now I see that I should invest in an actual iron so I can get those wrinkles out :)


The whole project only took around 20 minutes! 

Monday, October 21, 2013

Easy Decor for All Seasons

These hurricane vases were purchased at Target. Here's a link. It's a super easy decoration for each holiday or season by switching the contents. 


Thursday, October 17, 2013

DIY Burlap Ruffle Lamp Shade

This lamp was purchased at a garage sale for $4. I bought it knowing I would do something to spice it up a little. I liked the base, colors, and size, and for $4, I couldn't pass it up! I wish I had a before picture of this lamp, but the original shade was a tan color with dark brown swirls on it. 


I found scrap burlap on sale at Hobby Lobby and purchased 2 yards. 


I cut the burlap 1.5 inches wide, and the length was 3x the length of the lamp shade. I folded the strips in half and ironed them so they would be pressed in half. I then put hot glue on the folded edge of the strips, and pressed it onto the lamp shade in different designs.  I didn't really have a pattern, I just pressed them down in randomly swirled designs. 


Honestly, the lamp doesn't produce an extremely bright light because the burlap blocks some of it.. but it actually looks pretty awesome when the light shines through :) 


Wednesday, October 16, 2013

Button-Top Box

I wanted to make something special for my cousin to store all of her sorority pictures, name tags, and other keepsakes. I love the size of the photo storage boxes at Hobby Lobby, which you can find here for $1.99. 

Button box

I purchased a bag full of assorted gold buttons (similar, here) and hot glued them onto the lid of the box. I found some sticker ribbon strips for the edges of the box (similar, here) and stuck those on. 

button box

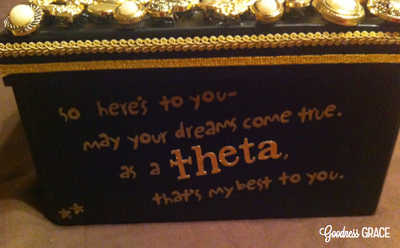
I tend to mess things up when I start free-handing letters, so I used more stickers to write lyrics from one of our sorority songs on the blank side of the box. 

button box

It turned out great, cost less than $10, and took less than 30 minutes to make! And, it's a thoughtful, practical gift. What could be better?


Monday, October 14, 2013

Jewelry Organization Display


For me, if jewelry is out of sight, it's out of mind. I decided to make my own jewelry display from some wooden picture frames. Now, it's not only easy to find my jewelry, I also have a pretty wall decoration! It's easier than you might think. Here's what I did: 


I found 3 open frames at Hobby Lobby. Helpful hint, they have to be real wood or the hooks won't screw into them. Here's a link for the frames. Wait for them to be 50% off (I have found that this happens every other week), or use a "40% off one item" coupon from your smart phone. I used two 8x10, and one 11x14. I painted them antique white using acrylic paint. 


For the earring holder, I used a plastic canvas sheet found in the knitting section of Hobby Lobby. When I was wandering through the isles (I hardly ever go down the knitting isle), I found these and had a lightbulb moment! It makes the PERFECT earring holder. I have seen similar earring holders made with chicken wire, burlap, and other fabric, but seriously this is the best option. Its more sturdy than fabric. If the page is longer than your frame, it's super easy to cut to size with regular scissors. And did I mention it costs 37 cents!! Here's the link for that. You're welcome, everyone. :)


For the bracelets and necklaces, I used little tiny hooks that I screwed into the wood by hand. These just cost a couple of dollars. Here's a link for similar hooks. 


Finished product:


I love it! And it really was an easy project!


Thursday, October 10, 2013

DIY Bench

Like I've said before, apartments = a lot of big blank walls and spaces. I wanted to make a low bench to take up some space. I also wanted to provide some more seating. I don't usually have a ton of visitors, but my friends and I have a bible study that takes place at my apartment sometimes. A decoration that doubles as optional seating is an A-plus in my book!


The only tools I needed to make this bench were a screwdriver and scissors. That's a good thing, because those are pretty much the only tools I know how to use :) The total cost was around $40. Here's how I did it: 

I bought 4 pre-made screw-top legs from Lowe's for $6 each. I then bought wood that was pre-cut to 12''x48", this cost around $10. This is a pretty narrow bench, by the way. So if you are bigger than me and my 5'2" friends, you might want to get one that's a little wider than 12". 

I purchased the fabric and quilt batting from Hobby Lobby. The home decor fabric seems to always be 30% off. When I am in the check out lanes at Hobby Lobby, I always google search on my phone for "Hobby Lobby coupon." The Hobby Lobby website has a weekly "40% off one item" coupon that you can use on anything in the store. Great deal!


I used a staple gun to secure the batting and fabric to the wood.


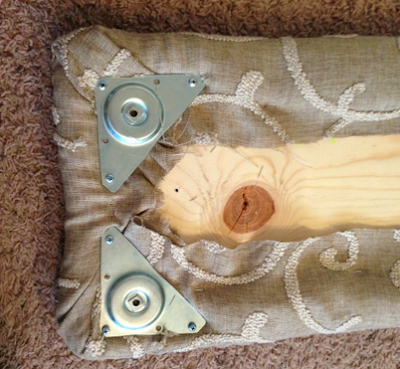
Then I used a screwdriver to screw these plates into the wood. I then put a light coat of antique white paint on the legs... and screwed the legs right into the plates.